Team Griffin Racing

Team Griffin Racing

Monday 19 February 2018

Bike Preparation - A Novices Guide to Starting Racing

So you've read about getting a license and you want to know the next step towards getting on that start line for your first race, this guide will take you through everything you'll need to fit to your bike to pass scrutineering and where you can get it!
If you've not got a license yet and want to know how to get one; read the first guide in the series to understand exactly what you'll need to do.  Click here for the link to 'Getting your License'


Now I've just mentioned one of the scariest words in motorcycling racing... Scrutineering! (Otherwise known as Technical Control) Other than the start of your first race, this will be the most nerve-racking activity of the weekend. Why you ask? Well, one of the first things you'll have to do when you turn up at a race weekend is take your bike to Hell, sorry, Technical Control. Before you can get on the grid it's an ACU requirement for you to have your kit and your bike checked over by scrutineers to ensure it meets ACU regulations. What I will guide you through first is what additional items you'll need to do to your bike to ensure you pass. It's not really that scary, it just causes unnecessary hassle and stress if you fail.
Please note: This guide covers the ACU General Technical Specifications for Road Racing, found here, different clubs often have additional requirements for different championships. Make sure you check the Supplementary Regulations for the specific club and championship you are racing in.

In preparation for 2018 I will be converting a relatively standard 2009 Kawasaki ZX-6R Road bike into a race worthy one. This bike is what I will be using to guide you through the process of 'prepping' your bike for racing.  So lets get going.

The first thing to say is that all bikes are required to have engine and frame numbers that have obviously not been tampered with or deleted, new unstamped components like frames are allowed. If you suspect your bikes numbers have been tampered with then contact the relevant authorities, if you're going to see a bike with tampered numbers... Walk away, no matter how cheap!

Step 1 - Fairings
Really the first step in preparing any motorcycle for track, racing or trackdays. Mainly to stop you damaging those precious road kits, you'll need a set of track fairings for 1 main reason; under section OIL CONTAINMENT in the handbook, it states that the lower fairing must be able to hold 50% of the machines total oil/coolant, should a major failure happen. It also allows you to get rid of the headlamps, brake light and indicators which are not required for racing and will save you serious weight. If you've already got a set of fairings, new or used, move onto the next step, but remember, fitted track fairings should be secure and handlebars MUST turn lock to lock without contacting any part of the fairing or screen.
Remember: When you remove any electrical item, make sure you sufficiently tape up all the connectors to prevent water ingress and rust/ shorting connectors.


Tip: If you buy new fairings then make sure you trial fit before painting them. Quite often youll need to drill holes and cut out sections to make a better fit. You don't want to be doing that with freshly painted fairings!

Step 2 - Numbers
Once you've got those fairings on, you'll need numbers. You can find these on ebay or a variety of suppliers, I use a really good guy called Roger Clements of Simply Signs & Graphics (roger596@gmail.com ), just send the font and size you need, he will send you a mock up of what you want and then do the rest.
So what do you need?
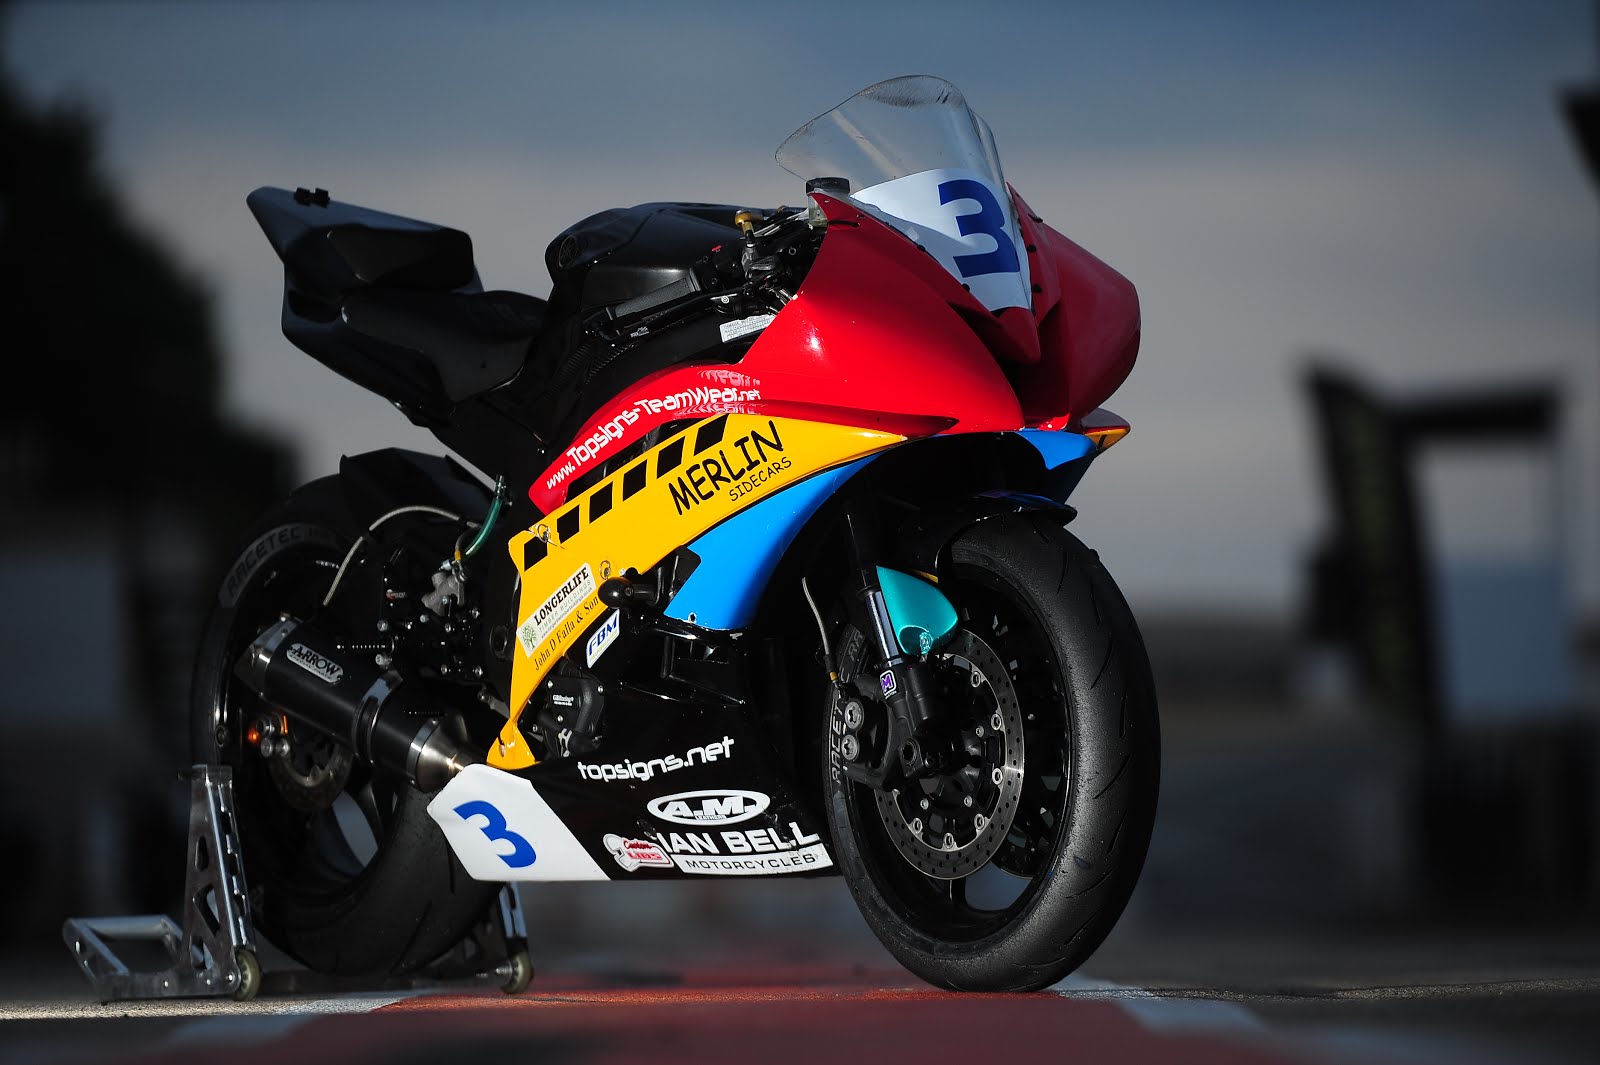
You need 1 main number which must be clearly visible from the front of the bike, this is usually applied to the front screen or front fairing. 2 side numbers, usually applied to the lower belly pan fairing, 1 on the left and 1 on the right.
Sizing... of much contention in the Road Racing world, some clubs are very strict, some a little more lenient. Regardless of how pretty you want them, you're best off sticking to the guidelines than being told to change them on the day of your first race
Minimum Dimensions for front numbers are a Height of 140mm and Width of 80mm per digit on a Background 285mm by 235mm.
Minimum Dimensions for side numbers are a Height of 140mm and Width of 80mm per digit on a Background 285mm by 235mm.
Colours depend on your class so make sure you know before you buy them but they tend to be:
600cc motorcycles - White Background with Blue Numbers
1000cc motorcycles - White Background Black Numbers

Step 3 - Lockwiring
This is an important part of preparing your bike for racing, the regulations state that any oil drain plugs or filters must be securely fastened and the most convenient way of doing this is lockwiring. For this you'll want to get yourself a pair of lock wire pliers, you can do it with mole grips but it's much more fiddly. I'd recommend a pair of Clarke pliers as well as some lock wire, both can be bought quite easily on ebay or amazon (see links below). The idea is to stop the bolt undoing so make sure you always fix it to something that pulls it tight.
What to wire?
Oil Filler Cap - Mandatory 
Oil Drain Plug - Mandatory 
Oil Filter - Mandatory 
Oil dip stick (where applicable) - Mandatory 
Grips - Optional
Brake Caliper Bolts - Optional
Brake Pad Pins - Optional

To lockwire these things, you'll need holes in them. The easiest way is to head over to the Pro Bolt website and pick up a full set of Race Drilled bolts, perhaps the easiest but also the most expensive. You can of course drill your own holes, but it's not an easy feat without a pillar drill.
Tips
- The one bolt I suggest you do buy pre-drilled is the oil sump/drain bolt. That's a big bolt to drill a  small hole in
- Check your oil filler cap, usually it's plastic/nylon which you can easily drill and save yourself £15
- Buy an oil filter with a nut on the end, they already have holes in to put the wire through and are usually priced similar to the OEM filters. I use K&N but I believe HiFlo do them as well


Pliers - Clarke Lockwiring Pliers
Wire - Lock wire
Sump Bolt - Pro Bolt race drilled sump bolt

Step 4 - Coolant
Simple one this... You can't run it or water wetter. Only water is allowed in the radiator.
Empty it out, flush with fresh water and refill with distilled / de-ionised water. Cheap from Halfords

Step 5 - Brakes
Specifically brake lines. For bikes with 2 front discs, which is most modern machines, you will need to fit brake lines which split at or above the lower yoke. That's either a race line (2 lines from the master cylinder) or a T line (1 line from MC which splits into 2 at the yoke)
Note - Although most never use it, you must have a functioning rear brake, they will check it's working during scrutineering. I'd recommend Goodridge lines, UK based manufacturer for pretty much every bike, a nice touch is they make them to order and are available in loads of colours.

Step 6 - Chain Guards
These are commonly known as sharks fins, think you can work out why! They are a mandatory item on race bikes for the purpose of preventing a riders fingers or other limbs getting trapped between the chain and the sprocket, should the rider become detached from their machine. You'll most likely need to drill and tap your swing arm so make sure you have the tools to do it. Chain Guards are readily available from GB Racing or R&G, or you could always make your own. Here are some pictures of the GB Racing one I fitted to the ZX6R.


Step 7 - Rear Red Warning Light
All bikes must have a functioning red light fitted facing rearward on the machine to be used in wet races or as instructed by Race Control. Ideally it should be mounted under the rear seat unit approximately on the machine centre line. These are easily available from ebay and can be battery powered, for solo racing the on switch can be on the unit. (Endurance racing it must be on the handlebar) I purchased one from Parkitt Racing, really easy to fit with just 3 bolts in a nice neat unit.
Rear Rain Light Link


Step 8 - Levers, Bars & Rearsets
Although not mandatory, I'd strongly recommend you buy a set of fixed peg adjustable rearsets and handlebar clipons. The rearsets will give you the ability to adjust footpeg position as well as the ability to replace parts in the event of an accident. Clipons in the same manner, a set of maxon or SES clip ons give you the ability to change the handlebar tubes which are usually the first things to bend on impact.
Remember - ACU regulation means that levers, footpegs and bar ends must have a rounded end to prevent an apple coring type affect if they land on your fleshy parts!


Step 9 - Side Stand
This must be removed mainly for safety, it's a relatively simple task but there is something you MUST remember to do. On most if not all of the bikes you choose to race there will be a side stand switch, this is to stop you moving away with the stand still down. Obviously when you remove this switch, the bike will always think the stand is down, this is what you need to do.

  1. Cut the plug off from the main harness
  2. Remove the wire insulation to reveal the copper
  3. Solder (if you don't have solder simply twist together) the two wires together
  4. Wrap with insulation tape or heat shrink to protect from the elements and zip tie out the way
This will trick the bike into thinking the stand is always up, just make sure you do remove it and keep it off as I've seen some nasty accidents in the pit lane with people forgetting


Step 10 - Wheels
Although it's not strictly in the regulations it is common practise to fit metal dust caps and tape over your wheel weights (to stop them flinging off if they come unstuck!) Again this is more common practise rather than mandatory but it could cause you to fail as many Scrutineers like it so it's worth doing.

Step 11 - Supplementary Regulations
There may also be supplementary regulations outlined by your club, it is your responsibility to check these regulations prior to attending a race meeting however there are two main items that are mandatory in many clubs and if not, are well worth your investment
  1. Front brake level guard: This is to protect the brake lever from being pulled accidentally in case of a bit of elbow rubbing or fairing bashing! There's a link below to the Tracktanium guard, this is what I have fitted and it's decent value for money.
  2. Secondary engine cases: These are usually plastic based covers which are fitted to the engine to prevent the cases from breaking during a crash and spilling oil over the circuit. They are well worth the money and are much cheaper and readily available than replacement cases. R&G and GB Racing are the main suppliers, both of which I've personally crash tested!
Lever Guard - https://parkitt-performance-motorcycle-racing.myshopify.com/products/tracktanium-brake-lever-guard

GB Racing Engine Cover
*these were bought used hence the missing letter paint

Well that's it, simples right! Thanks for reading, I hope this guide has been useful in helping you to prep your bike ready for racing. If you have any questions then please drop me a message.

Look out for the next blog... What to expect at your first race

Big Thanks to Parkitt Racing who have done a lot of the tuning and suspension work and supplied some of the items I've mentioned above. If you need advice these are the guys to ask!


Tuesday 31 October 2017

ECU Re-flashing - To Flash or Not to Flash

As you will see in some of my other blog posts I'm preparing a ZX6R to race in the 2018 No Limits Newcomers Championship. As part of these preparations I wanted to remove the Power Commander 5 that came with the bike in favour of an ECU reflash courtesy of Woolich and Parkitt Racing.

So what is an ECU reflash?
ECU re-flashing allows you to tune the various maps and settings available in the stock ECU. You're probably thinking well how is this beneficial, well; The system eliminates the need for other boxes and modules such as Power Commanders and ignition modules which merely modify the signals coming from the ECU, with ECU re-flashing you can directly modify the ECU for things like Fuel Maps, Ignition Maps, Secondary Throttle Maps and RPM Limiters. It opens up several options that aren't available using the other boxes whilst also getting a finer degree of tuning. So what does this really mean? It varies from bike to bike but this is what you can do on the ZX6R's:
The simple stuff...
  • Disabling the pair valve
  • Disabling the exhaust servo (this will remove the FI light if you have a race system or prevent the need to trick the bike into thinking it has one)
  • Disabling the Immobiliser (Allows you to go keyless)
  • Disable Stock O2 Sensor
  • Disable Tip Over Sensor (TOS)
  • Adjust RPM Limiters
  • Adjust Fan Temperature
The technical stuff...
  • IAP Fuel Maps
  • TPS Fuel Maps
  • Ignition Timing Maps
  • Secondary Throttle Plate (STP) Opening Maps
  • Injector Balance Maps
  • Ram Air Maps
I'm a big advocate of ECU re-flashing, I've used Power Commanders and Bazzaz units before but the freedom it gives you to disable sensors and systems only really required for road along with the finer tuning of maps results in better throttle response, smoother power curves and in the case of my ZX6R, bigger power gains.

How do you go about doing it?
Once you've decided you want to go for a re-flash there are two options to choose from:

1. Buying the full kit
This option includes the full package you will require to flash your ECU and inherently the most expensive (~ £375 Plus £150 for a dyno re-map)
The package includes:
- USB (Denso or Mitsubishi) v3 (Used to to connect your computer to your ECU)
- USB Cable
- Manufacturer specific harness
- Bin File Definition in the Woolich Racing Tuned software

This option will allow you to flash your ECU on the bike at any time using your computer. It's very useful if you're constantly re-mapping your machine and want the ease of just being able to plug straight in at the circuit or at home. Most of the time this isn't the case so for many of you, option 2 is the best.

2. Woolich Dealer re-flash
This is the option I went down, mainly due to the lower cost and I didn't have the desire to do my own re-mapping. Firstly, you'll need to find yourself a tuner which owns the flashing equipment for your bike. I used Parkitt Racing in Tuxford for my 2009 ZX6R, they've been around since 2000 and have extensive experience in both road and racing machines, double check with them that they have what you need but they do stock equipment for most modern machines. It's as simple as dropping off your bike and leaving it with them. (There is a postage option where you can send in your ECU, they will flash it with a generic map and post it back, it's £150 for this service but it's not recommended as every bike is different and you'll never have a perfect map)

So what do they do while they have it?
To start with they will hook up your ecu and flash in a known good map, this will give a base for the dyno tune. The guys will do a run on the dyno and identify improvements to be made, this will be repeated until they're done, it's really that simple.

Add ons

Race Tools
Race tools is the real highlight of the Woolich products. The Race Tools package allows you to enable Quickshifter, Launch Control and Pit Speed Limiter in the Stock ECU.
It includes:
  • High quality strain gauge Quickshifter with digitally controlled pressure sensing that can be used in regular or race shift pattern. Quickshifter Kill times are configurable per gear and kills both fuel and ignition directly from the ECU. These are Cordona quickshifters and rebranded for Woolich, having tried the dynojet QS and a few others I can honestly say this is the best quickshifter I've used, it's incredibly smooth and the ability to control pressure sensitivity means you get a real positive gear change.
  • Race Tools ECU Key to enable Launch Control and Pit Limiter.
    • Launch Control allows you to modify Delay, Launch RPM, Ramp Time and Ramp RPM
    • Pit Speed Limiter allows you to set the RPM to limit the speed while riding through the pits
    • Auto blipper for clutchless downshifts is available on some models as well
The cost of the Race tools package is around £370, this may seem steep but you get a quality quickshifter with the added benefits of Launch Control and Pit Limiter. Stand alone QS such as the HM SS come in at £350+ so you're getting much more for your money. Parkitt can also add a 2 button switch which will give you the pit limiter button and an on/off switch for rain lights.


Thursday 16 February 2017

Getting a License - A Novices Guide to Starting Racing

Trackday's are a growing trend amongst the biking community; there's really no other feeling like getting out on track for the first time to test the limits of yourself and your machinery without the threat of a lamp post or car drivers. Trackdays are great fun, rewarding amongst a long list of other perks, but like myself many seek greater things the "Holy Grail of motorcycling" you could call it. I remember sitting there watching Superbike Sunday as Marc Marquez duelled with Jorge Lorenzo at 200 mph, on the edge of human and mechanical possibilities. Crutchlow pinging himself skyward (again), thinking, "I really want to try this, how hard can it really be?" So I set out on a long, tiring, money sapping, time consuming, life changing journey that led me to the start line of an actual race, with people watching!

If you find yourself reading this, it's not because you can't decide whether you want to race or, it's in your head and nothing is going to stop you (apart from the money, that stops us all!). This guide won't be about helping you chose to race or not, just give you the tools that will allow you to start your journey; it will give you all the information about how to get going in Road Racing. (ACUs term for Short Circuit track racing)

What License Can I apply for? Firstly you need to know what license you're going to apply for. The two available for first timers are: Novice & Intermediate Novice. Below is a extract from the ACU guidelines outlining the requirements for each license.

https://members.acu.org.uk/2016-Road-Race-Notes.pdf
REMEMBER: If you have a Full UK "A" License, apply for the Intermediate Novice License. This will allow you to enter races on any capacity machine.


Step 1: Filling out the forms
So now you know which license to apply for, there are two options: Online or Paper Form, the good old paper method is probably the best option for new license applications as there are a number of things you need to do before you can send off the form.

A. Download a copy of the ACU Competition License application form and print out a copy.
2017 ACU Competition Road Race License Application Form
(If you don't have a printer you can call the ACU on 01788566400 and they will post a copy to you)

B. Fill out all the relevant sections (guidance file link)

C. You will need 4 additional items before the ACU will accept your application
     i.    A nice pretty picture of you - Passport photo is ideal. It'll go on your license so make it a good            one!
     ii.   An eye test - Take page 2 of the form to any optician and they should be able to complete this              for you. Most will charge a fee but if you're lucky some are free. They will test you, sign it and            stamp the form to say you've passed.
     iii.  An affiliation code (See Step 2)
     iv.  CTC & Basic Rider Assessment Course Pass (See Step 3)

D. Complete Steps 2 & 3 and get your License!

Step 2: Join a Club
To get a Road Race License you must join an ACU affiliated club. In this guide I won't cover or suggest clubs to join, that's completely up to you based on what class of bike you have and what championship you want to race in. Joining a club will not tie you to this club permanently it's just a requirement for the application.  I myself, joined 1 club and raced with them throughout the year, I felt this was best as you got to know the people and the way that club runs their race weekends. Others feel trying different rounds with different clubs gave them a better understanding of which club they preferred, do what you feel is best for you. There is no limit to the amount of clubs you can join but you will need a membership to enter that specific clubs events. (Ie. A membership to No Limits Racing will not allow you to race with Thundersport)
Most clubs now allow you to apply online, the cost is around £30 and this will allow you to enter all of that clubs events throughout the calendar year.
IMPORTANT: Once you've joined a club, you will get sent a 9 digit ACU affiliation code, make sure you fill this code out in Section 6 of your ACU Application Form (See Step 1 item C. iii) as it is one of the mandatory requirements.

Step 3: Do the Course
This is the final stage of the application process and requires you to complete 2 courses, most if not all providers will do them both in one day:
Competitor Training Course (CTC) - Classroom session where you will be tutored on various aspects of racing, such as flags, safety, etc. At the end of the sessions you will need to answer a multiple choice test, it's nothing to worry about, just make sure you pay attention to to teacher!
Basic Rider Assessment (BRA) - This is an on-track course (so you'll need your bike), it will cover a range of practical exercises that will introduce you to all aspects of on-track race craft. It will assess your competency to ride and give you the chance to experience attending the assembly area > coming onto the grid > the warm-up lap > the lights and the best bit...the start!

 You can find a list of 2017 courses here

Finally, the course leader will stamp Section 7 of your application form and in most cases be responsible for sending off your form to the ACU for processing, approval and eventually a brand new shiny Road Race Licence card through the post! It can take a couple of weeks to come through so don't worry if it doesn't arrive before your first race, you can call the ACU and they will give you your license number so the club you race with can cross reference it with their records.
IMPORTANT: Remember to take your application form with you to the CTC/BRA course, ensuring you have attached a photo, passed your eye test and filled out your affiliation code in Section 6 (See Step 2).

That's it, just one of the stages complete towards doing your first race. The next section will cover your bike and how to prepare it for racing. Below are some useful links to the ACU and some major clubs.

Useful Links
ACU (Auto Cycle Union)
2017 ACU Competition Road Race License Application Form
License Form Guidance Notes
ACU CTC/BRA Training Courses 2017
No Limits Racing Race School
Thundersport GB
North Gloucester Road Racing Club (NGRRC)

Friday 20 May 2016

Stunning Second at Snetterton

It was a short stint to Round 2 of the Metzeler Newcomer 600s Championship with No Limits Racing. Just 15 days after leaving Oulton Park Round 1 we were setting up in the paddock for another weekend of close racing.

The forecast for Friday Test was a bad one, no matter which app you usually confide in, they were all saying wet, even The Weather Channel which tends to be overly optimistic! Having slipped off on 'muddy' Murrays corner 2 weeks prior, I was aware of the danger! We got set up and were going to play it by ear, quite literally. As I woke on Friday to the sound of rain bashing against the van roof, it didn't inspire confidence that a prank was being played with a hose pipe. Hastily opening the door confirmed my worries which was swiftly slammed shut and I returned to bed! Later hearing upwards of 50 riders took a tumble that day tells me if I had ridden, one of them would definitely have been me!

Onwards to Saturday Morning and a wet start to proceedings. Snetterton in the wet with only 12 minutes qualifying leaves a maximum of around 4 laps to get a quick one in. Heavy spray was being kicked up which made it's way onto the inside of the visor meaning visibility was extremely limited. Clear track opening up in front gave an opportunity of the visor to clear and managed to stick in a time good enough for 8th place.


GOOOOOOOOOOOOOO! Race 1 is away and it's a great start, into 4th and for once away with the "Leaders". It's a lap of 2 halves, Sector 1 had a very definitive dry line all the way to the Bentley Straight but Sector two was still rather wet. Lap 1 complete in 4th place with only 3 seconds covering the top 5. Into Brundle for the second time, a good drive down the Bentley Straight and I was up to second! Keeping pace with leader it was certainly a battle of nerves but I was better placed following to see where we could push the boundaries. Lap 4 and I'd been taken and pushed into third at Ago's, then a mistake onto the back straight and I was struggling to keep up. 3rd place I thought... it's all I'd dreamed of this year was one trophy. But then I thought, I think I'd like a bigger one! The leaders had bunched up and by the end or Corams I was right there with them, into the left hander then CRASH!!! Back stepped out on the power and snaps back into line, straight over the bars and down hard! But for once IT WASN'T ME! Marginally missing both bike and rider I'd dropped 2 seconds behind the leader, time to consolidate 2nd when the Red Flags came out.
The confusion was unbearable! We crossed the line for what had been 3/4 distance and I was trying to recount where I had finished on count back, but it didn't matter. It was a result! I'd finally managed to do what I set out to do 4 years ago when I set out on this journey. Something realistically I never though was possible, but it did!

Fans cheering from the bank. (okay no fans but my Dad and girlfriend Michelle were there, they're probably my biggest!) The joy was genuinely overwhelming, all the hard work, crashes, money, broken bikes, blown engines, more crashes, more money. All symbolised by this one gold covered Cup.

The other races were relatively boring in comparison so you don't really need to hear about them! This won't be the last post but I'll end it with a massive... THANK YOU! To Mum, Michelle, Dad, Chris, everyone else that has helped, supported and whatever else you've done!

See you at Donington!

Alex James Photography
No Limits Racing
Symmetry It Solutions


Friday 28 February 2014

Ducati move to open class machines


It has been confirmed today by Gigi Dall’Igna that the Ducati MotoGP team will be moving from Factory machinery to the open class.

Although this will be a blow to Cal Crutchlow who moved to Ducati on the promise of Factory machinery, it appears that Andrea Dovizioso has had a much better test on the open bike and has been able to post much quicker times against the Factory Ducati.

Ducati's analysis points towards the Open class as being a more viable option, although restricted by the control ECU from Magneti Marelli it means they will get a softer option of Bridgestone, more engines and an extra 3 litres of fuel.

Monday 24 February 2014

Changes to the MotoGp Calendar

If your thinking of making a trip to a GP round this year then make sure you use the latest revision of the calendar. Luckily our trip to the Catalan GP hasn't been affected but Brazil and Aragon have been.

Grande Prêmio do Brasil has been removed

Gran Premio de Aragón has moved to the weekend of 26th-28th September.

Monday 10 February 2014

MotoGP 2014 Teams & Regulation Changes


For those of you who haven't caught up with the rule changes for this year, here is a brief overview:

The majority of technical regulations stay the same for 2014 with the exception of 3 restrictions. Factory bikes (Honda, Yamaha & Ducati) remain full prototype machines, still limited to 4 riders per manufacturer. Yamaha and Honda have both developed production bikes that comply with the new ‘open’ class regulations, these bikes can be hired by customer teams to complete under the new open regulations. The regulations also allow teams to develop their own bikes such as the PBM chassis'd Aprilia.
This table below explains the regulation differences between the classes.


Electronics*
Engines
Fuel
Factory
Factory Software
5
20 litres
Open
Standardised
12
24 litres
*all bikes must run ECU Hardware provided by Magneti Marelli


It is still unknown whether Ducati will switch to their open bike for 2014, they have until the 28th February to decide. For now, here is a split of which teams & riders are running which bikes.


Factory Teams / Riders
Honda Racing Corp
Marc Marquez
Dani Pedrosa

Yamaha Factory
Jorge Lorenzo
Valentino Rossi

Ducati Factory
Cal Crutchlow
Andrea Dovisioso

GO&FUN Gresini Honda (Satellite)
Alvaro Bautista

LCR Honda (Satellite)
Stefan Bradl

Tech3 Yamaha (Satellite)
Bradley Smith
Pol Espagaro

Pramac Ducati Racing (Satellite)
Andrea Iannone

 ‘Open’ Teams / Riders
GO&FUN Gresini (Honda)
Scott Redding

Pramac Racing
Yonny Hernandez

Cardion AB Racing (Honda)
Karel Abraham

NGM Forward Racing (Yamaha)
Colin Edwards
Aleix Espagaro

Avintia Racing (Yamaha)
Hector Barbera
Mike Di Meglio

Drive M7 Aspar (Honda)
Hiroshi Aoyama
Nicky Hayden

Ioda Project Racing (Aprilia)
Leon Camier
Danilo Petrucci

PBM (Aprilia)
Broc Parkes
Michael Laverty